
Steps to install and configure SFTP (SSH File Transfer Protocol) on Windows 2012 R2 Server
Caution! : This guide is for a proof of concept only. The steps below give access to the entire server through SFTP. Please mind of security.
1. Download v0.0.13.0 / OpenSSH-Win64.zip from OpenSSH for Windows binaries
Note: v0.0.15.0 does not work with the following steps.
2. Extract the package to C:\Program Files\OpenSSH
3. As the Administrator, install SSHD and ssh-agent services:
powershell.exe -ExecutionPolicy Bypass -File install-sshd.ps1
4. As the Administrator, generate server keys by running the following commands from the “C:\Program Files\OpenSSH”
.\ssh-keygen.exe -A
5. Open a port for the SSH server in Windows Firewall:
Run the following PowerShell command as the Administrator:
New-NetFirewallRule -Protocol TCP -LocalPort 22 -Direction Inbound -Action Allow -DisplayName SSH
Also open a port for SSH on your firewall.
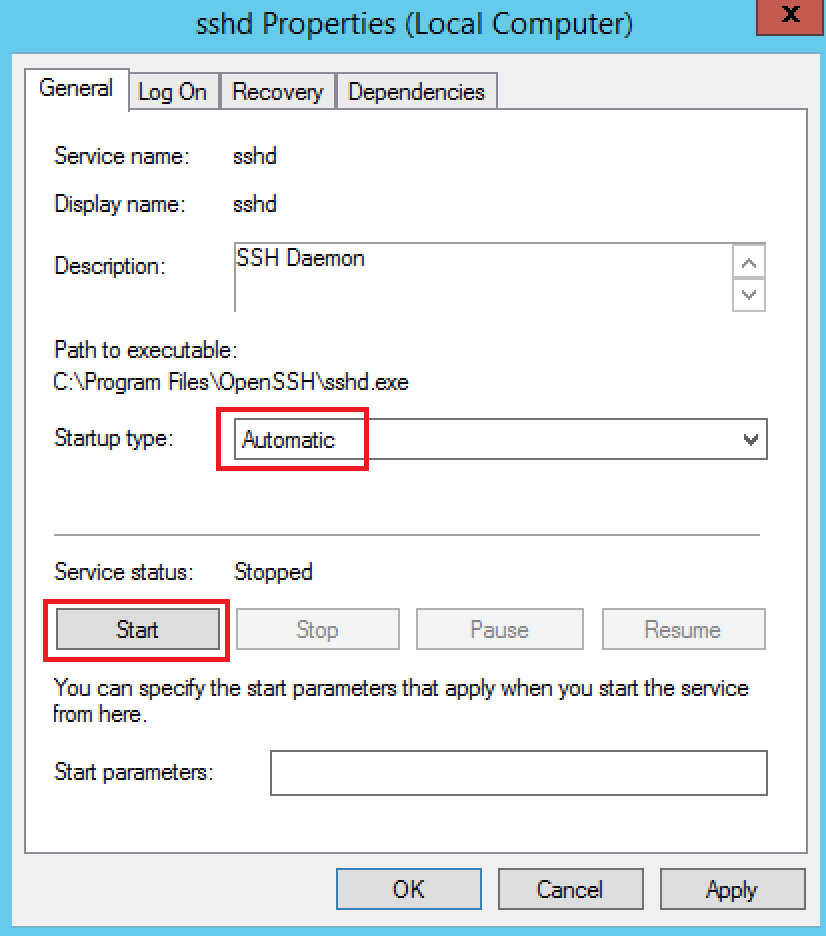
6. Start the service and/or configure automatic start:
7. Create the .ssh folder (for the authorized_keys file) in your Windows account profile folder (typically in C:\Users\username\.ssh).
Use the command below as Explore does not like the folder name.
mkdir .ssh
8. Grant the SSH server read permissions to the .ssh folder. As the Administrator, run:
icacls C:\users\username\.ssh /grant "NT Service\sshd:R" /T
9. As the Administrator, find out fingerprint of the server’s ED25519 key by running the following command from the C:\Program Files\OpenSSH:
.\ssh-keygen.exe -l -f ssh_host_ed25519_key -E md5
10. Restart the server
Reference : https://winscp.net/eng/docs/guide_windows_openssh_server